
Prototyping is where all the discovery phase work we’ve done to date comes together. It’s the first manifestation of the project brief, the user personas, the user stories & acceptance criteria, the discovery audit, the information architecture, and the user journeys. We take all of this work and turn it into the initial user interface (UI) for the website / app we’re building.
Remember, we know the screens we have to prototype because of the information architecture. We are confident in the iA because it’s been designed alongside user journeys and user stories, which are informed by the personas.
Why Prototype?
Ultimately, prototypes are about functionality, layout, and hierarchy of the product first. Form comes later. They’re designed for efficiency and conversation, so we can evaluate and revise the UI against personas, user stories, technical constraints, KPIs and the like.
We include them in the discovery phase because prototypes often unveil a few more requirements, technical constraints, and considerations prior to heading into the Design & Build cycle. They often end up surfacing new understandings around user stories and functionality. For example, you might sketch out a UI for a document finder that includes the ability to search for documents published by a specific author within a date range and in a specific file type. That functionality might not have been captured in the acceptance criteria for that user story – but now we’ve captured it, thanks to the prototypes, and updated the acceptance criteria to account for it.
The above discovery changes the effort level and delivery plan, and that’s just one example why prototypes should be a part of the discovery phase.
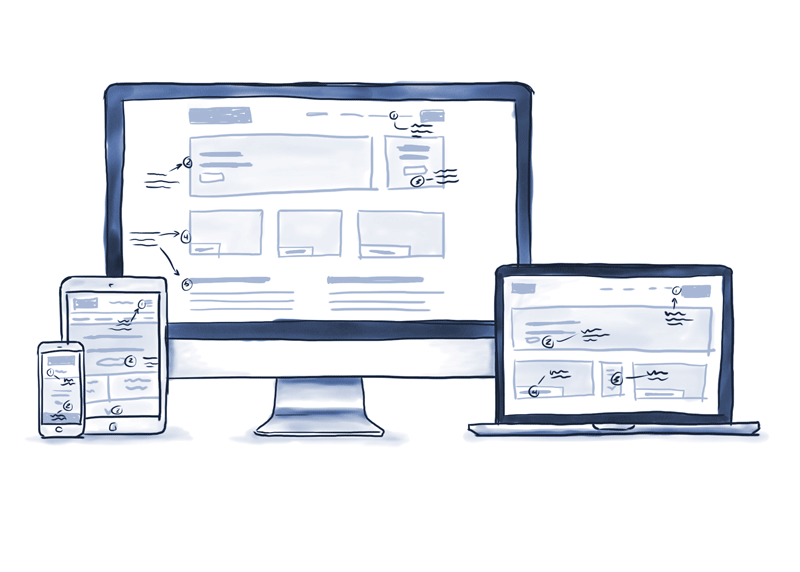
What Format Should My Prototypes Be In?
The short answer is: whatever format represents the best value. The more helpful answer is a bit longer. Let’s talk about common formats prototypes can come in, from lowest effort to highest, and when they’re often most useful.
Sketches
We’re talking literal paper and pencil sketches here. Paper prototypes are the lowest-fidelity, quickest way to map out a UI – and often, they’re the best answer. No matter what, we always start with pencil sketches at Paper Leaf – so much so that we’ve made some printable UI sketching templates available for you below. You can download and print off the files – which contain grids and placeholders for mobile, tablet, and desktop – then sketch to your heart’s content, within the context of the device you’re prototyping for. We use the same ones.
Get Free, Printable UI Sketch Sheets!
Just like we recommended starting with paper and pencil for user journeys because you’ll likely make a bunch of changes, we recommend you start with paper and pencil for prototyping for the same reasons.
Sometimes – for more straightforward websites – pencil sketches are all that’s required. For certain projects, we’ve gone right from pencil sketches to development and high-fidelity design comps. Alongside everything else in the discovery phase, too, they often end up surfacing new understandings around user stories and functionality.
Whether you’re working with an internal team or hiring an agency, providing rough sketches – assuming UI prototyping is in your wheelhouse, skill-wise – helps further communicate your intent and expectations while simultaneously sparking collaborative conversations. For example, some clients have provided us sketches in the past, which gives us a great starting point in either estimation for the project, or in the actual Design & Build phase.
Static Wireframes
The next rung up on the ol’ fidelity ladder, when it comes to prototypes, are what we dub static wireframes. Basically, these are non-interactive, low/no-colour UI mockups – think grey boxes and text. When we deliver static wireframes, we make them in our UI design tool (confusingly called Sketch).
Static wireframes are a great middle ground when pencil sketches are too low-fidelity for the project, but HTML/CSS prototypes are overkill. For example, for larger websites that are more about content discovery and consumption, we’ll use static wireframes. For web applications and mobile apps, we’ll move into HTML/CSS prototypes.
Static wireframes present a few additional benefits:
- They can be easily presented in the browser or on a device – mimicking the context of an actual user interacting with the product
- They can often be created very quickly given the proliferation of wireframe kits available
- All parties invested in the project can share the files easily, and if you’re using something like InVision, comment directly on the files themselves
- They can be turned into clickable prototypes via 3rd party tools like InVision or Marvel
On that last point: using tools like InVision to create clickable prototypes is interesting and sometimes helpful, but often we find it’s more labour-intensive and less authentic than just creating the prototypes in HTML/CSS. Anecdotally, we’ve found that we receive much more helpful feedback on clickable prototypes when using HTML/CSS versus “faking it” with other design tools.
HTML/CSS Prototypes
HTML/CSS prototypes represent the most realistic, highest effort rung on the prototype ladder. They’re best used for application prototypes (mobile or web) rather than website prototypes. Primarily, that’s because applications are generally more about user interaction and the completion of objectives (e.g. log a ticket, upload a photo) compared to a standard website.
The drawbacks to HTML/CSS prototypes are that they require knowledge of the languages to produce them (although this is changing with drag-and-drop tools like Adobe Edge Reflow and Webflow), and they can be higher-effort and thus higher-cost.
However, they do provide some key benefits:
- Done right, the code produced can be used going forward into the Design & Build cycle (so there’s little rework or wasted work)
- They represent the most accurate “end state” of the product, which is important when testing prototypes for validity
- They can be quickly updated, for example based on feedback, if structured right; and lastly,
- We’ve found HTML/CSS prototypes to elicit much more useful feedback than any other prototype method when used for web and mobile applications.
Producing & Testing Prototypes
Just like everything else in the discovery phase to this point, prototypes need to be not just produced, but tested against what we know. Generally speaking, here’s how we do it, and how you might want to tackle it too:
- Use the information architecture in conjunction with the user journeys to figure out which screens to prototype. Don’t prototype every little screen in the app or website – odds are 20% of the screens will deliver 80% of the value.
- Sketch out those screens on paper (use our free paper sketching templates if you want). If you like organization, write down the screen ID from the iA doc next to the screen you sketched, so you can easily cross-reference.
- Pick a user journey, then run through the screens to complete that journey (or if an actual user is available, get them to do it, ask questions and observe). When we say “run through”, it can be mentally, or you can literally cut out the sketches and shuffle through each screen one by one, mimicking the journey with paper.
- Look for inefficiencies, confusion, and general opportunities to improve the user journeys. Those improvements can be as big as redoing entire sections or screens, or as simple as making a button a little bigger.
- Revise the sketches and retest.
- If the value is there, and you possess the technical skills, make them a little higher fidelity by turning them into static wireframes or HTML/CSS prototypes. Alternatively, don’t. You do you.
Overall, creating prototypes can be pretty straightforward. However, the quality and effectiveness of the prototypes themselves largely lies in the process, the execution, and the expertise of whomever is producing those prototypes. When done properly, prototypes are an absolutely essential part of unpacking and building a high-quality digital product.
Prototypes are also the final step in our Discovery Phase for digital projects. If you’ve completed every step along the way, you’ll have a comprehensive and educated understanding of what your digital product needs to be successful. If you’re hiring an agency, this is everything required to make an informed estimate on the project. If you’re working internally, your development team will appreciate the clarity around needs. And if you didn’t complete every step, for time or another reason, there is value in any progress made. The rest of the steps should still be completed, of course, but they can be handled by other members of the project team or an agency. Good luck!